Modelling a head in Blender
Viacheslav Slavinsky, 2000.
Edited by Martin Bradstreet
`You know,' he added very gravely, `it's one of the
most
serious things that can possibly happen to one in a battle--to
get
one's head cut off.'
Tweedledee.
 |
Modelling a head is a rather simple task, although very few
can really accomplish good results at it. The shape of a human head is nothing
extraordinary, but it is a thing that we see many times everyday. That's
why anything that's wrong immediately catches our attention. We feel them
instinctively (and especially those of others!). It is important so, that
the head should look right and be in the right place.
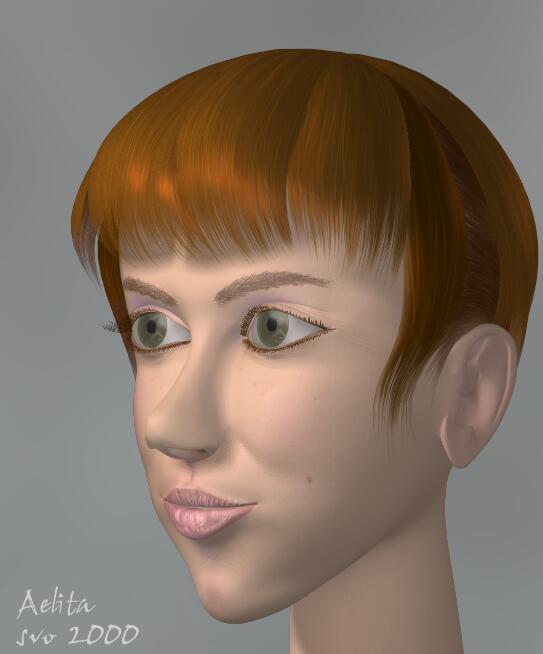
In this tutorial we'll create a rather pretty head. We'll use Blender's
mesh editing tools. Blender is really the best at mesh editing, so why
let this feature go. In Blender it is really easy to create meshes of
any degree of complexity and without any constraints.With the help of
other tools you can get nice smooth surfaces built with very few polygons.
|
Preparing a Sketch
| Many people try to avoid the sketching stage. However, this
is a very important stage and making a couple of sketches could shave off
many hours of work later. I understand those folks who avoid doing that..
I'm not really good at pencil myself. But still, I prepared a sketch right
in Blender, with the help of Bezier curves.
|
|
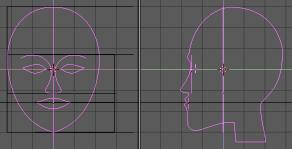
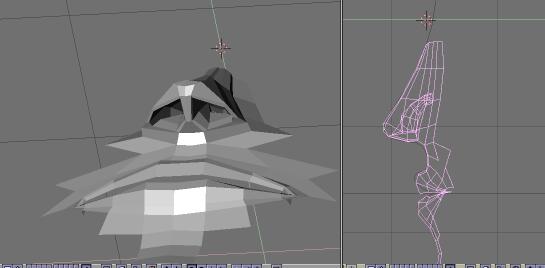
This is a very rough sketch and later it will be seen, how unprecise it is. But
to start out with, it will be fine. If you're not a pencil master, picture something
of the sort. It will serve you as a guide when you'll fill the empty space with
polygons.
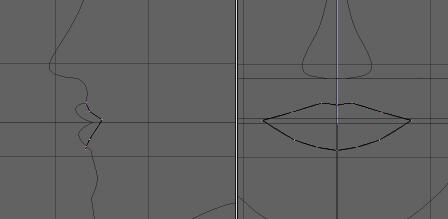
To make a sketch, I have prepared the golden section rulers. Pay attention
to how the face parts are correlated with proportions. The eye cuts are placed
approximately at half the head's height, despite of the common belief that they
grow on the forehead. This is a very common mistake indeed, please avoid doing
so.
Use beziers at full throttle. To make them more attentive, use vector and
independent handles. Select a control vertex, press VKEY to make the vector
handles. HKEY will make them independent and another press of the HKEY will make
them default back again. After you're done with curves, move them back and forth
in depth.
To make the sketch separate from our editing space, yet visible, it is a good
idea to move it into another scene. The following actions show how to do that.
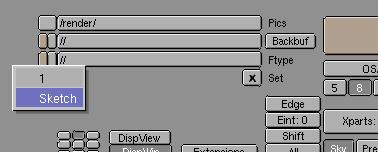
- Choose ADD NEW->Empty in the scene selector at the top of the screen
(now you probably see SCE:1 there). Thus we will create a new empty scene. Now
click the selector, pressing shift this time: it's a good idea to give this
scene a name, say, "Sketch".
- Press Ctrl-Left, which will move us to the screen called "screen" from
"screen.001". Did you note that "screen" still contains scene "1"? Kinda
useful, isn't it. Select all objects on the scene "1". It will only
make sense to leave the camera unselected.
- Now press CTRL-LKEY. Choose "To Scene.." in the menu and select "Sketch"
scene. After we're done with that, all objects from the current scene became
linked with the objects from the another, to where we linked them to. As a
visual proof, we have objects' pivot points turned blue from magenta. The
beauty of this action is in the fact that if we delete those objects from the
current scene, they'll stay in the another and vice versa.
- Let us remove everything except for the Camera from the scene "1". Select
all, unselect camera and press XKEY, Erase Selected? Yes.
-
| Now for the kicking part. Go to RenderButtons, F10 and
select "Sketch" scene in the "Set" group.
As a result now we see our sketch, but can't spoil it. It's gray and
uneditable (or unedible). This is called convenience.
|
|
Now, after you've done all of that, if you paid enough attention you would
ask: `But why? Why not rename the first scene into "Sketch", create a new one,
and start working there?'. Answer: because just in case you didn't know how to
link objects between scenes, now you know. Now get down to the business. Let's
model the head and fill some polygons.
Lip Contours
Add a simple Plane mesh (SHIFT-AKEY, MESH->PLANE).
Remove one vertex leaving so only 2 edges. They will become the lip corner.
Now and below it is the intensive mesh editing action going on. It's nice to
know and remember those functions:
- Vertex select:
- AKEY - select/unselect all
- BKEY - border select
- BKEY-BKEY - circular select. Gray +/- change the circle radius.
- HKEY - hide selected vertices
- SHIFT-HKEY - hide all vertices, except for the selected
- ALT-HKEY - show and select hidden vertices
- Vertex operations:
- GKEY - grabber, move vertices
- RKEY - rotate vertices
- SKEY - scale. In scale mode you can make a gesture to show in which
direction do you need to scale, then a middle click locks scale in only one
direction. This is crucial for symmetric modelling.
- OKEY - Proportional Editing Tool. Kind of a magnet. Drags all points
after it. Farther the weaker. In the 3D window header you can find a switch
of the bias characteristics. Gray +/- cnange the bias sphere.
- XKEY - remove vertices, edges, faces. Don't you ever think that you
won't have to remove anything.
- Ctrl-LClick - to add a new vertex.
- FKEY - make an edge or face.
- EKEY - extrude. Extrusion is a very powerful tool that allows to make
edges from vertices and faces out of edges (read: interdimensional fatigue
generator!) Hard to understand before you actually use it.
- WKEY:Remove Doubles - vertex welding tool. Select a pair or more, scale
them down very close together and remove doubles.
And now we have all the tools necessary for mesh editing. We have the lips
corner. Now let's move it right, rotate and match it with the sketch line. Then
add more vertices with Ctrl-LeftClick and make edges with FKEY. You should get a
mesh contour, something like this picture:
Making the Volume
Now we have the lips contour. Wonderful. Now let's add volume to them. With the
help of extrusion we can add some more contours for the upper and lower lips.
Usually I do that vertex by vertex, or in pairs to keep the symmetry, moving them
in the side view. By moving them back or forth you make it easier to edit later
because it's easier to select when all points are shifted relative to each other.
But keep the symmetry - the points should be in pairs: left/right. Fill the missed
faces manually - select four vertices and press FKEY. Yes indeed, nobody will
fill them for you! And in this tutorial you'll fill yourself about a 1-1.5k of
faces by hand and extrusion - one by one.
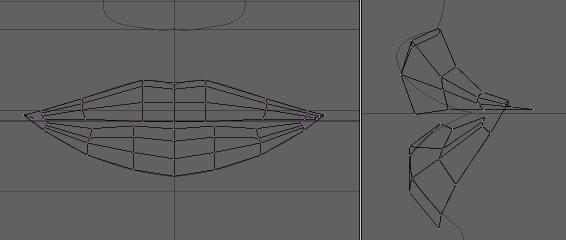
Pay attention to the lip corners. The line that's pulled from the corner will
go not to the mouth center, but in depth of it. Carefully fill that place with
squares.
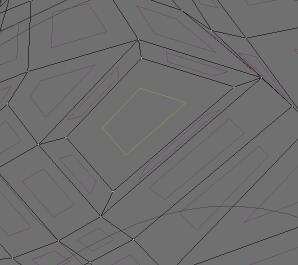
I prefer to model with squares. This is more convenient than triangles,
because you get less edges and a cleaner look. Besides that, mesh subdivision
algorithms tend to work better with squares. In the end I had to add an extra
subdivision to this model and the evil triangles emerged, but at least I could
move it to the place where they are hardly noticeable.
Build the Surface Around the Nose
Now that we have the lips we will just spread sidewise and up and down, stretching
the skin around the skull. The most complicated part is on the way up and we will
start from there. Right after the lips there is Nose. Make the filtrum (the area
that connects the bottom of the nose with the upper lip), without big detail for
the time being, prepare the nose contour with vertices, add a face left and right.
Then pull the bottom of the nose bridge to the front.
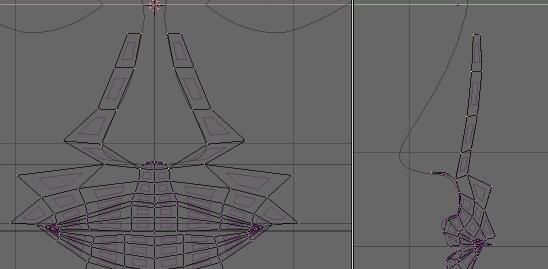
On this picture you can see the vertices that are to be extruded forward to
build the nostrils. Extrude and seal carefully by solving several head twisters
about not making triangles when most tempted to do so and get something like
this:

Nostrils
We got a 20/20 nose, but you can hardly breath through it. To
fix this we need to make some holes in the nose. Let's explore the power of the
extrusion tool.
Rotate the mesh so that the bottom of the nose can be nicely seen. Now select
the square that's sealing the nose from the bottom. Press the EKEY: Extrude?
Sure, go on. Press teh SKEY right then and make the extruded quad a little
smaller in size. We get this funny picture.
For free we got 4 new faces, thus added the volume where there was none. Push
the new face deeper into the nose. I thought one isn't enough and I pushed some
more. Then I pulled the pipes inside. Not that they are subject to be visible
ever, but it won't hurt if your model can really breath.
Cheeks
Now we have the lips and the nose it's a good idea to build it to the eyes. Between
there grow cheeks on the cheekbones. Don't forget about them, especially when
you're making the face really puffy and when you decide where to place more vertices
and where to place fewer vertices. It's a good idea to count in the muscle disposition
around the face. Roughly they radiate around the mouth and around each eye so
we need to build a smooth transition from the lips to the eye holes.
When moving vertices in side view, select them in pairs with border select
tool. You will not break the symmetry this way. And, similarly, when you move
points in the front view, use scale instead. It takes some time to get used
to this. Actually you could model only a half of the head and then glue the
halves together, but I don't like that method.
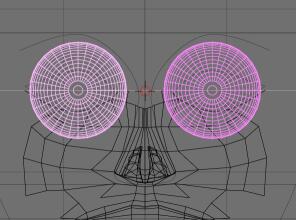
Adding the Eyes
| To avoid the excessive suffering caused by the skin falling
apart from the eyeballs, add the eyeballs now. The human eyes are, naturally,
damned huge. It's just their bigger part is hidden under the skin. If you
doubt it, touch your skull around the eye holes with a schtangenzirkul and
you could note that the vertical size of the eye hole is just about the
half of the eyeball diameter! Anyway, scale them to your taste. I like them
eyes huge so you might think that I made them larger than normal.
The eyes can tell lots about a person. From the way he/she looks you
can know a lot about a person. The character imposes on the forming of
the facial features, the size of the eyes, the folds and wrinkles around
them.. This might be just the first and a very subjective impression,
but when I meet someone first of all I look at their eyes and lips (I
started modelling with lips this time, you see). Some people, for example
the designers of Lara Croft, consider other body parts to be more valuable.*
|
|
Eyelids And Eyebrows
Here it's pretty much the same technique as with the lips. Carefully extrude and
fill. The eyeballs serve you as the rulers. There's not much more to say about
this stage.
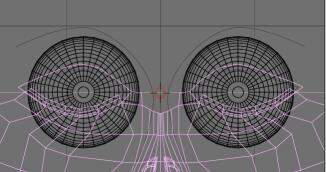
When the eyelids are ready, it's about time to go to the eyebrows. So far,
we don't have a very realistic transition- there's no fold. But you could form
it later, at the moment it's easier to edit it as it is. As a matter of fact,
here the eyebrows are a little bit too high, I lowered them later.
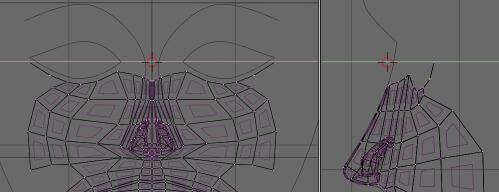
The rest
Now it's time for sweating. We have created the main facial
features, now it's necessary to fill all the holes and make the whole volume.
Sculpt the chin, make decent cheek and cheekbones, make the back of the head and
a smooth transition to the neck. This is a mighty work, but it's hard to
describe it step by step. Now that you are familiar with all mesh editing
techniques you have to accomplish it by yourself, trust your fantasy and
intuition. May these pictures be a sort of a hint for you.

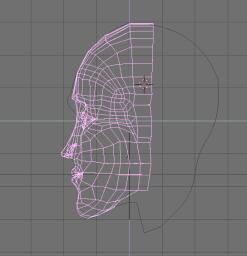
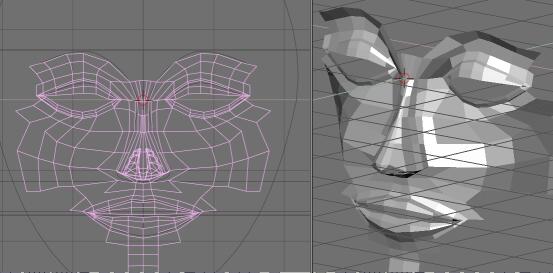
On the right picture you can see how to wrap up the squares avoiding
triangles.
When we have the ready shape, it's the time for sculpting. When you'll turn
on perspective mode (5PAD) you'll most likely get scared.
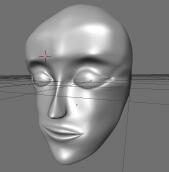
To the left there is a not so normal head for a healthy person. You should
give it the correct form. Round up the mouth, create cheekbones and make the
folds around the nose. The nose itself is far from perfect too. Lower the eyebrows
and make decent eyelid folds and, as a finishing touch, put on the textures.
And oh, the ears! Ears are harder than the rest of the head and they are subject
to another tutorial. At this stage it makes sense to use a mesh smoothing tool.
You have a choice of S-Mesh or Catmull-Clark. S-Mesh, being a builtin tool,
is faster but does not give as smooth results as Catmull-Clark plug in.
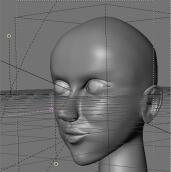
Transforming the face from the state of the left picture to the state of the
right one took me a while. During two weeks I've been touching my face and
shamelessly staring at the girls in metro. Probably I could save the time by
preliminary painting the sketches on paper and collecting good reference images.
I wish you to touch and stare and model cute and scary heads and not only heads.
Happy blendering!
For the afterword I would like to express my gratitide to _poe-t for critique
and numerous pieces of advice which helped me a lot while I've been modelling
this head. He was also the originator of the name Aelita. The name came up because
first she was bald, although did not have the blue skin. But the name sticked
to her anyway. I would also like to thank Martin "Gimpoid" Bradstreet
who edited the text and eliminated some weird mistakes.
* as a matter of the fact this is almost the exact quote of Igor
Posavec. Igor, I'm sorry but I couldn't resist =)